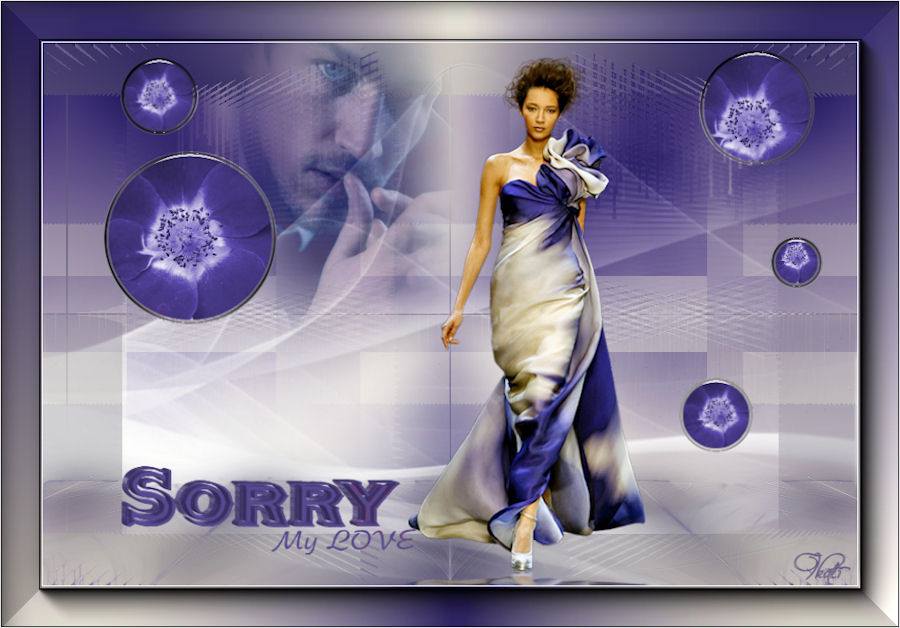
many thanks for Mieke for beautiful Translations


This Tutorial Created with Psp x12
Before you began To The Lesson
Open Tubes İn Psp
You can change Blend Modes according your color
Tubes
Sorry_my_Love_Alpha-Selections
Narah_mask_0717 , Narah_mask_0725 , Narah_mask_0726
Gül jpg From web
MV_CentenialRose_15-11-07
MV_Cooper_26-07-10
MV_TopOfTheWorld_17-06-2012
Sorry My Love textCanan
Materials
Alternatif Link
Plugins
Graphics Plus - Cros Shadow
Eye Candy 5 Impact - Perspective Shadow
Eye Candy 4000 – Drip
Mehdi - Sorting Tiles
Eye Candy 5 Impact – Glass
Simple - Center Tile
MuRa's Meister - Perspective Tiling 1.1
Mock - Windo
Unlimited Filter - Factory gallery G
Let's start
Foreground Color #13170c
Background color #a40f0f
1-Open Sorry_my_Love_Alpha-Selections
2-Selections- Select all
3-Edit - Copy gül image and go to your new layer paste
into selections
4-Selections - Select None
5-Adjust - Sharpness – Sharpen
6-Adjust - Blur- Gaussian Blur - Radius 20
7-Layers - New Raster Layer
8-Fill this Layer With the Gradient
9-Adjust - Blur - Gaussian Blur
10-Open Narah_mask_0717
11-Layers - Mask Layer From İmage
12-Layers - Merge - Merge Group
13-Change Layer Opacity to 95
14-Adjust – Sharpness - Sharpen
15-Layers - New Raster Layer
16-Selections - Load/Save Selection - Load Selection
from Alpha Channel Selection #1
17-Fill the Selections with the same gradient
19-Selections - İnvert – Delete from your keyboard
20-Selections - Select None
21-Effect - Graphics plus - Cros Shadow
22-Adjust - Sharpness - Sharpen
23-Change the Foreground Color to #13170c
24-Layers - New Raster Layer
25-Fill with the Foreground Color #13170c
26-Layers - New Mask Layer - Narah mask 0725
27-Layers – Merge - Merge Group
28-Change the Blend Mode this layer to Luminance Legacy
29-Adjust - Sharpnes - Sharpen
30-Layers - Arrange - Move Down (in 2 times)
Your Layers
like this now
31-Layers - New Raster Layer
32-Selections - Load/Save Selection - Load Selection
from Alpha Channel Selection #2
33-Change Background Color to White #ffffff
and Change Layer Opacity to 45
34-Fill this layer with and change the opacty to 100 again
35-And after you Fill must Change the color to Backgraound color #a40f0f
36-Selections - Select None
37-Layers - Dupliacte
38-İmage - Mirror
39-İmage - Flip
40-Layers – Merge - Merge Down
41-Layers - Duplicate
42-On this Duplicate Layer (Copy of Raster 3)
43-Effect – Simple - Center Tile
44-After click on the Orginal Layer (Raster3)
45-Effects - Mock – Windo (default)
46-Click on the Second Layer from the top (Group-
Raster2 )
47-Layers - New Raster Layer
48-Selections - Load/Save Selection - Load Selection
from Alpha Channel Selection #3
49-Fill with your last Gradient
50-Adjust - Blur - Radial Blur
51-Selections - Select None
52-Effects - Distortion
Effect - Speak Halo
53-Layers - Duplicate
54-İmage - Mirror
55-İmage – Merge - Merge Down
56-Change Layers Properties - Blend Mode (Soft Light )
57-Layers - Duplicate
58-Effects
- Eye Candy 4000 – Drip
59-Effects - İmage Effect - Seamless Tiling - side by side
60-Place on the Orginal Layer (Raster 4)
61-Effects - Mehdi - Sorting Tiles – Mosaic
62-Layers - New Raster Layer
63-Now change your gradient for this
64-Selections - Load/Save Selection - Load Selection
from Alpha Channel Selection #4
65-Fill the Selected with this gradient - KEEP
SELECTED
66-Adjust - Blur
- Gassian Blur (Radius 20)
67-Open Mask Narah_mask_0726
68-Layers - New Mask Layer from image
İnvert data not checed
69-Selections - Select None
70-Merge - Merge Group
71-Layers- Duplicate Layer
72-İmage - Mirror
73-Layers - Merge - Merge down
74-image - Flip
75-Effects - MuRa's Meister - Perspective Tiling 1.1
76-Effects - 3D Effects - Drop Shadow with red color
77-Effects – 3D Effects -Drop Shadow 5 / 5/ 70 / 58.42 with black
78-Adjust – Sharpness - Sharpen
79-Step on the Raster 4
80-Effects - Seamles Tiling - side by side
81-Layers - Duplicate
82-İmage - flip
83-Click on the top Layer
84-Effects - Eye Candy 5 İmpackt - Glass – Ruby
85-Change Layers - Properties - Blend mode This Layer Luminance
L. or Hard Ligth as you like
86-Open Tube Mv_Cooper_26_07_10 (men tube)
İmage -Resize %80
87-Edit - Copy
88-Edit - Paste As New Layer (Raster7) and change the Opacity to 45
89-İmage - Mirror
Move
like this on the top ( see İmage)
90-Open Tube MV_CentenialRose_15_11_07
91-Edit - Copy
92-Layers - New
Raster Layer
93-Selections
- Load/Save Selection - Load Selection from Alpha Channel Selection #1 again
94-Selections - Modify - Contract 6
95-Edit - Paste as New Layer
96-Move it to right for your image
97-Selections - İnvert
98-Edit - CUT or Press Delete from your Keyboard
99-Selections - İnvert
100-Again Paste As New Layer tube in the memory
101-Pleaced to the Left for the image
102-Merge - Merge Down
103-Selections - İnvert
104-Press
Delete key from your Keyboard
105-Selections - Select None
106-Layers - Merge - Merge Down
107-Effects - Eye Candy İmpact - Glass - Clear no drop
shadow Click Basic and change the glass color to your color I used my red Color #a40f0f
108-Open tube MV_topOfThe world_17-06-2012 (women
tube)
109-Edit - Copy
110-Edit - Paste as New Layer
111-Effects - İmage Effect - Ofset 82 / -19
112-Adjust - Sharpness - Sharpen
113-Effects - Eye Candy İmpact - Perspective Shadow –
Reflect in Front - Faint
114-Open Tube Sorry
My Love Text
115-Edit - Copy
116-Edit - Paste
as New Layer
117-Move it to the left as image
118-İmage - Add Borders -1 pixel with #ffffff White Color
119-İmage - Add Borders - 45 pixel with #a40f0f Red Color
120-Magic Wand Tool click to last borders
121-Layers New Raster Layer
122-And Fill with your Second Gradient
123-Selections - İnvert
124-Click the Bottom Layer
125-Selections - Promoted Selection
126-Layers - Arrange - Bring to top
127-Effects – 3D Effects - Drop Shadow 0 / 0 / 70 /
42,57 black
128-Selections - İnvert
129-Click on the Middle Layer
130-Adjust - Blur - Motion Blur
131-Selections -
Select None
132-Merge - Merge Down
133-Effects - Texture Effect – Fur
134-Effects - Plugin - AAA Filters - Photo Frame
135-Effects - Filters Unlimited - Filter Factory
Gallery G - Bevel 1.5
136-İmage - Add Borders - 1 pixel white Color
137-İmage - Resize 900 All Layer Checed
138-Add your name or
put your Watermarkt
139- Save JPG
With my Love
Canan Tutorial
October 2015
WARNİNG
This tutorial Written By Canan special for gifanimasyon.com No to copy and shared on every web..
Onether versions
Dersi Test eden Arkadaşlar;
Hepsine özel Teşekkürlerimi iletiyorum..
Test için çok Teşekkür ederim Mü Ablacım..
Thankyou very much Hubert Koenigsecker
Thankyou very much Maria Fernandez

Thankyou very much Kata Kiss

Thankyou very much Eva Verba

Thankyou very much Ria van Schaagen

Thankyou very much Terna Katalin..
Thankyou very much Maria Fernandez

Thankyou very much Kata Kiss

Thankyou very much Eva Verba

Thankyou very much Ria van Schaagen

Thankyou very much Terna Katalin..
çok Teşekkür ederim Ceylanım ..


